Tutorials
I've included what I can in writing, but if you prefer video format, keep an eye out for my upcoming Youtube tutorials!
Pattern: Cross stitch patterns are basically just a grid with different symbols that represent each color thread you're meant to use and where it should go. All the patterns in my shop include both a color version (which I prefer, as it's easier to keep track of where I'm working) and a black-and-white version.
Fabric: Cross stitch is usually done using Aida fabric, which comes in different stitch counts. This just means that for every inch of material, there is a certain number of stitches. I prefer to use 14-count Aida fabric, and all of my patterns are designed with this particular fabric stitch count in mind. Technically, you could cross stitch onto any material, with any fabric and any thickness of thread. The technique remains the same. In fact, I enjoy making small keychains using this plastic mesh canvas. It's stiff and keeps projects more sturdy and durable since they don't bend so much (perfect for things that will likely see some wear and tear, like keychains).
Needles: Most cross-stitchers use tapestry needles rather than sewing needles. Tapestry needles are shorter and duller, which makes them a whole lot easier to use for cross stitch techniques. Lots of cross stitch kits come with these needles, but if you need to buy them separately, I got this pack of ten, and I've loved them! I always make sure to have more than one ready, just in case I lose or break the one I'm using.
Embroidery floss: I prefer floss from DMC; they're colorfast, so the colors don't bleed if you decide to wash your project. They also have the most accurate and consistent color-labeling system, and they're high quality. All of my patterns include a DMC floss list. Side note: When using 14-count Aida fabric, it's common to use only two strands of the thread at a time, so you can get more use out of one skein of embroidery floss than it may seem.
Optional:
Embroidery hoop: These come in all sorts of sizes. Each pattern listed in my shop mentions the recommended hoop size that will fit the design as intended. They come in different materials, but I prefer wood; I've found that they grip onto the fabric better than plastic hoops. The tension that embroidery hoops enable you to create makes cross stitching easier and more even. However, plenty of cross stitchers prefer not to use any sort of hoop and would rather be able to bend the fabric when they stitch in order to go faster or hold the project more comfortably. It's all according to preference, so give both methods a try!
Needle minder: These are basically magnets that you can clip to your fabric, ideally when you've already set it up in your hoop (the tension makes it sturdy). It's the perfect place to put your needle when you need to set it down. No more losing needles! Plus, they come in countless styles, so it's quite customizable.
Project box: I love to set up a small box when I start a new project so everything I need is at hand and easy to carry around when I stitch in different locations around my house. I just bought this small embroidery floss organizer and took out some of the dividers so I could fit some small scissors and a multi-tool that could also hold my needles. It's the most convenient and useful tool I've used for my cross stitch projects!
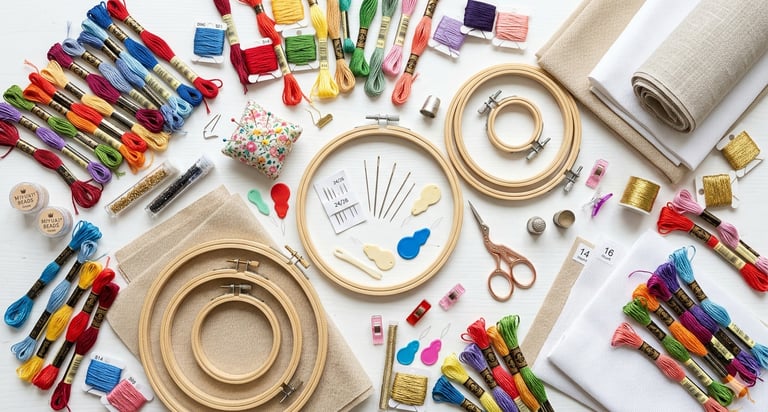
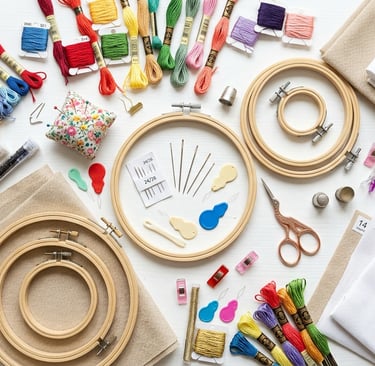
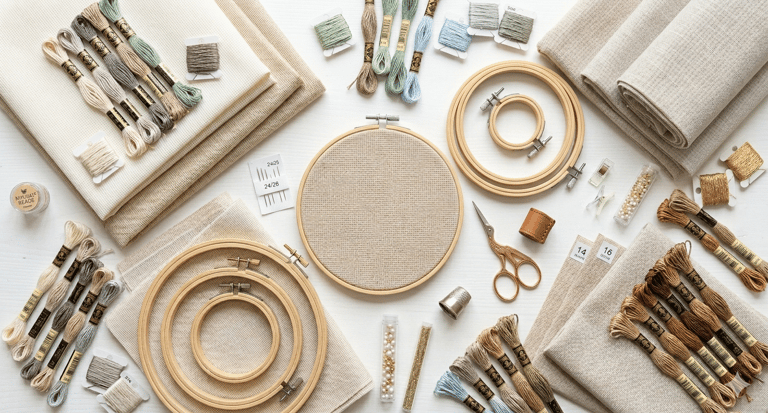
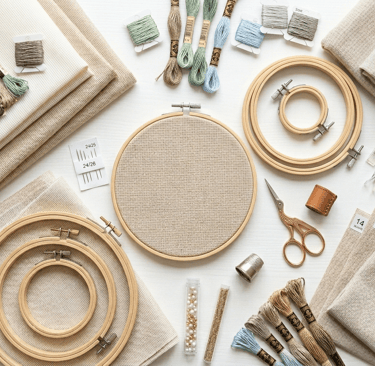
Materials
How to determine fabric size for your project: First, determine the stitch count (all of my patterns include the stitch count, which should look something like "80x87 stitches") and the fabric count (like 14-count Aida). Next, calculate the design area. Just divide the stitch count by the fabric count, and you'll know the actual space that the design will take up. Do this for the width and the height. From there, add three inches of extra fabric on all sides so you can be sure it will fit into your hoop or frame.
How to find the middle of your fabric: Fold the fabric in half, then in half again. The closed corner is the center of your fabric. Give it a pinch so the crease will still show when you unfold it, and then you can either mark it with something, or start stitching right away.
How to make projects more kid-friendly: Get fabric that has larger holes (and therefore a lower thread-count), and use yarn and a yarn needle, rather than embroidery floss and a tapestry needle. This makes it far easier to keep track of where your thread is going, and where in the pattern you are. Also, using a digital pattern tracker is very helpful because you can zoom in and mark off stitches as you go. I love doing this; it's very helpful for younger stitchers or those who wish to avoid eye strain by squinting at a small, printed pattern for too long.
How to read a cross-stitch pattern: Most patterns will have some kind of arrow on the outer edges of the grid. These are to indicate where the center of the pattern is so you can align it with the center of your fabric. The grid itself is where the entirety of the pattern lies, which can sometimes be split into multiple pages if the pattern is large enough. Most of my advanced patterns do this, but my beginner patterns fit on one page for ease of use. The symbols each represent a floss color. There is a key/legend included in your pattern that indicates which symbols represent which colors. In the color version of the pattern, it will also be color-coordinated for each of use. Usually, every tenth line in a cross stitch pattern is thickened to help you count more easily. If a pattern has more than one stitch type, this will also be indicated. All of my patterns are made up of the classic x stitch, so there's no need to indicate other stitch types.
Setup
Techniques
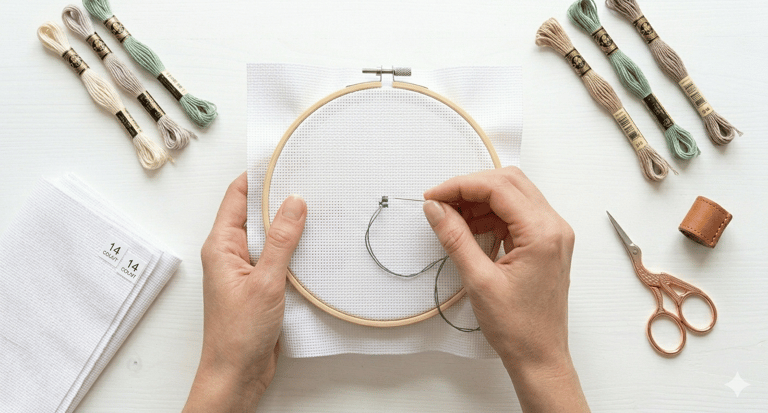
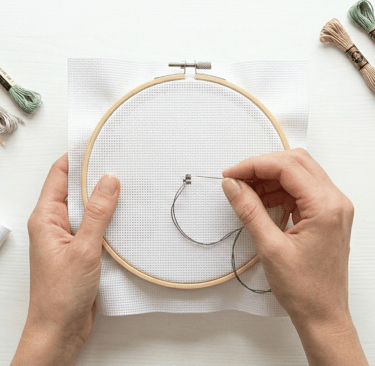
How To Do a Loop Start
Prepare your thread: Cut a single length of embroidery floss that is twice as long as you usually prefer. Pull out one single strand from the bunch. Fold that single strand exactly in half so the two cut ends meet. Thread your needle with the two cut ends, leaving a loop at the long end of the thread.
The first half-stitch: Bring your needle up from the back of the fabric to the front through your starting hole (usually the bottom left of the x. Pull the thread through, but don’t pull it all the way. Leave a small bit of the loop dangling on the backside of the fabric. Push your needle down through the hold diagonally opposite (the top right) to complete the first half of the x.
Secure the loop: Turn your hoop (or frame) over to look at the back. Pass your needle through the thread loop that you left hanging in step 2. Pull the thread toward the front of the fabric. As you pull, the loop will tighten around the stitch, anchoring the thread firmly to the fabric without a knot.
Continue stitching: Flip back to the front. You now have a perfectly secured starting point! Continue your stitches as usual.
How To Do a Loop Finish
Method 1: The Loop Tuck (back of the fabric). After the last x, turn your work over. When you look at the stitches from the back, you’ll see vertical bars of thread. Slide your needle under the vertical bars of the last 3 or 4 stitches. Before pulling your thread through, leave a small loop. Pass your needle through that loop and then pull tight. This creates a tiny, flat hitch knot. Cut the thread close to the fabric.
Method 2: The Pin Stitch (front of the fabric). Bring your needle up in the center of the square where your next stitch would go (piercing the middle of the fabric weave). Create a tiny anchor by going back down through the fabric one or two threads away. Come back up through that same center point, pass the needle through the small loop you just created on the surface, and pull it taut. Snip the thread right at the surface. The tension of the fabric will hold it, and the next cross-stitch you work over that area will hide it completely.
Method 3: The “Under the X” Slide. On the back of the fabric, run your needle under 4 or 5 nearby stitches. Loop the thread back and run it under those same stitches again, but in the opposite direction. This back and forth creates enough friction that the thread can’t pull out. Snip the tail.
Railroading Method
The goal is to use your needle to physically separate the two strands as you push the needle down into the fabric.
How to do it: Bring the needle up from the back to the front to start your half-stitch as usual. Let the two strands of floss lie flat against the fabric in the direction you’re about to stitch. Before you push the needle down into the hole, place the tip of your needle between the two strands of thread. With the needle still separating the strands, push the tip into the destination hole. As you pull the thread all the way to the back, the needle acts as a guide, forcing the two strands to lay flat and parallel on the surface of the fabric.
Just railroading the top leg: If you want to save time, you can railroad only the top leg of your x (the second diagonal). This is the part everyone sees, so ensuring it is flat makes the biggest visual impact.
Railroading the full x: For the most solid look (especially on lower-count Aida fabric like 11 or 14), railroad both the bottom and the top legs.
Tip for smoother railroading: Every few stitches, let your needle and thread hang freely from your hoop. It will spin and naturally untwist itself, making railroading much easier.
Parking Method
Choose your starting square: Work from the top left 10x10 grid of the pattern and move across the row. Select the first color in the top left corner. Stitch all the symbols of that color within that specific 10x10 square.
Park the thread: When you run out of that color in your current square, look at your pattern to see where that same color appears next (usually in the square immediately to the right or below). Bring your needle up from the back to the front at the starting hole of the next stitch for that color. Remove the needle from the thread and let the strand hang on the front of your fabric. This thread is now parked and waiting for you.
Repeat with the next color: Pick up the next color symbol in your current 10x10 square. Stitch all instances of that color within the square. When finished park that thread in its next location. Continue until the next 10x10 square is completely filled with stitches.
Move to the next square: Once your first square is solid, move to the square to the right. There should be several thread already parked there, hanging and ready to go. Thread your needle with one of the parked threads. Complete the stitches for that color in the new square. Park it again in the next available spot.
Tips for success
Use gridded fabric: Parking is very difficult without a grid. Use a water-soluble pen or pre-gridded Aida so you can easily see your 10x10 boundaries.
Dealing with the forest of threads: You’ll end up with lots of threads hanging off the front. Some people use hair clips or needle minders to hold the idle threads out of the way so they don’t get tangled while you work.
Consistent direction: Always park in the same hole of the stitch (for example, always parking in the bottom left) so you don’t get confused about which stitch the thread belongs to.
Other Tips For How to Keep the Back Tidy
The Away Knot (temporary anchor): Tie a knot at the end of your thread. Pop the needle down through the front of the fabric about 2-3 inches away from where you want to start. Start stitching your pattern. As you work towards that knot, ensure your stitches on the back are trapping the thread tail. Once the tail is securely buried under 4-5 stitches, snip off the knot at the front.
The Buried Tail (weaving in): Instead of knotting, flip your work and slide your needle under 3-5 existing vertical stitches on the back. If you’re using a very slippery thread (like silks and metallics), weave it under, then wrap it once around the last vertical bar and weave it back the other way.
Avoid carrying thread: One of the biggest causes of a messy back is carrying — jumping your needle from one area to another far away area. If the next stitch is more than one inch (about 5-6 squares) away, don’t carry the thread across the gap. It’s always better to finish the thread and start fresh in the new spot.
Mind your travel direction: If you always stitch your half-crosses in the same direction (for example, bottom left to top right), your back will naturally form neat vertical lines. Try to move through a row in a way that your needle always travels vertically on the back.
How to Wash a Cross Stitch Project
Pre-wash check: Make sure the threads you used in your project are colorfast. This means the colors won’t bleed when they get wet. Most DMC and Anchor threads are colorfast. If you’re unsure, test a small scrap first. Also, ensure all your tails are securely woven in on the back so they don’t unravel during the soak. If you used a water-soluble gridding pen, make sure you followed the specific instructions for that brand (some pens require cold water only in order to disappear).
Soak: Fill a clean sink or bowl with lukewarm or cool water. Never use hot water, as it can shrink the fabric or cause thread bleeding. Add a drop of very mild detergent. Dish soap is excellent for cutting hand oils, or you can use a dedicated textile wash like Eucalan or Orvus Paste. Avoid harsh laundry detergents with bleaches or “oxy” additives. Lay your project flat in the water. Let it soak for 15-20 minutes. Don’t scrub or wring the fabric, as this can distort your stitches. You can gently swish it around if there’s a visible smudge.
Rinse: Drain the soapy water and refill with fresh, cool water. Rinse the project by gently moving it in the water until all soap is gone. Never twist or wring the fabric to get the water out. This can permanently damage the fiber structure of the Aida.
Towel Roll: Lay a clean, white, lint-free towel flat on a table. Place your wet cross-stitch face up on the towel. Roll the towel up like a burrito with the project inside. Gently press down on the rolled towel to absorb the excess moisture.
“Damp” Iron: For the smoothest finish, you should iron your project while it’s still slightly damp. Place a thick, dry, white towel on your ironing board. Place your cross-stitch face down on the towel. Set your iron to a medium-hot cotton setting (turn off the steam). Then iron the back of the project, and continue ironing until the fabric is dry and perfectly flat.
Storage: If you aren’t framing it immediately, store the clean, flat piece between two sheets of acid-free tissue paper or inside a clean mailing tube to prevent new creases.
How I Make My Keychains
Prep: Most plastic canvas is 14-count or 4-count (larger holes for yarn). 14-count is best for detail. Use standard embroidery floss, 2 strands throughout each stitch. If you want extra poof or better coverage to hide the plastic, try 3 strands.
Stitching the design: Start small by choosing a design that fits within a 1.5 to 2-inch area so the keychain isn’t too bulky. Leave at least 2-3 empty holes of margin around your entire design. You’ll need this space for cutting and finishing the edges. If you don’t want to back it with felt like I do, make sure you keep your back neat; it will be visible. Avoid carrying dark threads across white space, as you can see them through the mesh holes.
Cutting and shaping: Once the stitching is done, use sharp snips to cut around the design. Leave one empty row of plastic holes all the way around your stitching. Trim the little nubs off the plastic to make it as smooth as possible on the edges.
Backing: I like to pick a coordinating felt color, then add some fabric glue to the back of the project and stick it down onto the felt. Then I trim the felt around the project and then finish the edges.
Finish the edges: I prefer to do a whip stitch. To do this, use the same color thread as your border. Pass the needle through an edge hole, go over the plastic edge, and come back up through the next hole. When you hit a corner, go through the same corner hole 2 or 3 times to ensure the plastic point it completely covered by thread.
Attach the hardware: Don’t just clip the metal ring of your keychain to a single strand of thread. Instead, use a pair of pliers to open a metal jump ring and pass it through one of the holes in the plastic mesh (near the top center). Close the jump ring around the keychain clasp. To finish off the keychain, some people use fabric protector spray to prevent the light-colored threads from getting dingy over time.
How to Use Stitchly
Stitchly is my favorite cross stitch app at the moment. It’s mainly used for designing cross stitch patterns, but they also have a fantastic pattern tracking side. These instructions are for that pattern tracking side.
Prep your pattern: Import or create your pattern. Then tap the next arrow.
Enter stitching mode: Look for the play button icon. This officially shifts the app from editing to tracking. You can view the pattern as solid blocks of color or as symbols. Symbols are usually easier to manage.
Highlighting and marking: Tap a symbol in the legend or on the chart. All instances of that color will light up, making it easier to see where to stitch next. To mark a stitch as done, just tap that individual square. To mark several stitches at once, use the paintbrush tool while in progress mode to paint over a group of stitches as you finish them. The app will automatically calculate the percentage of the pattern you’ve completed as you mark of squares.
If you’re working on a large design, Stitchly allows you to break it down. You can go into settings to adjust the size of the grid you want to focus on (I usually do 10x10). Focus View helps prevent screen overwhelm by letting you focus only on the current area you’re working on.
Note: Stitchly is a one-time purchase, not a subscription.
How to Use Markup R-XP
Load your chart: Tap the (+) icon in the bottom right. Choose your pdf or take a high-quality photo of a paper chart. The app will show thumbnails of the pdf. Tap the pages that contain the actual chart (ignore the cover, instructions, or floss list for now). Tell the app how the pages fit together (for example, 2 pages wide by 3 pages high). Markup R-XP will put them into one continuous, scrollable map.
Calibration/modeling phase: To define the grid, drag the blue actor points to the corners of a grid section on your chart. Use the zoom tool to ensure the digital lines fall exactly between the symbols. Go to the pages you identified as the key. Draw a box around the symbols and their corresponding thread numbers. The app will attempt to read the DMC/Anchor numbers automatically.
Selecting and highlighting symbols: Tap the Symbol Picker (usually at the top center). Select the icon you want to work on. The app will highlight every instance of that symbol across the entire multi-page chart in a bright color, like yellow or green. You can gray out everything else so only your active color pops, which is a lifesaver for heavy confetti sections.
Marking progress: Tap a square to mark it as finished. You the Lasso or Magic Wand tools to highlight an entire area and mark it all at once (great for large blocks of single color). If you’re using the parking method, you can long press a square to mark it as parked. It will show a different color/icon so you know there’s a thread waiting for you there.
How to Use Pattern Keeper
Import your pattern: Tap the (+) icon on the main screen and locate your pattern file. The app will analyze the pdf to find the grid and symbols. If your pattern has overlapping rows between pages, the app will ask you to confirm. This ensures you don’t double-count stitches at the page breaks. It will also show you a sample of the grid. If the red lines don’t match the chart’s block lines, you can manually adjust them.
Train the legend: Once the grid is set, Pattern Keeper will show you the list of symbols it found. You may need to type in the DMC/Anchor numbers for each symbol if the app doesn’t recognize the font automatically. Once saved, you shouldn’t have to look at the paper key again.
Searching and highlighting: Tap any symbol on the chart. Every instance of that symbol across the entire pattern will light up. You can pinch to zoom until a single stitch fills half your screen if you wanted. Super helpful for confetti sections.
Marking progress: Drag your finger or a stylus over the stitches you’ve completed. They’ll turn gray (or whatever color you choose in settings). Long press a square to mark it as parked. A small colored circle will appear in the corner of that square to remind you that a thread is waiting there. If you make a mistake, select the stitches and tap the frogging icon (literally an icon of a little frog) to clear them back to unworked stitches.
Note: This app is only for Android.